Setting up a network printer can seem like a maze of technical challenges. Many users get frustrated when their devices won’t talk to each other across different operating systems.
This guide tackles these common issues with clear, easy-to-follow solutions. Our expert advice will help you solve connectivity problems and make printing smooth.
We’ll show you how to connect your computer to a shared printer. You’ll also learn how to fix printer issues when it’s offline.
Just follow our step-by-step guide for a successful network printer setup. Soon, you’ll be able to print wirelessly from any device on your network.
Understanding Printer Network Fundamentals
Before you start, it’s key to know the basics of network printing. This knowledge helps you pick the best method for your setup. It also tells you what each method needs for a smooth setup.
Types of Printer Networks: Wired vs. Wireless
Printers connect in two main ways. Wired networks use Ethernet cables for a direct link to your router. This method is superior in stability and performance because it avoids wireless interference.
A wired printer network is faster and more secure. It’s less open to external access than wireless options. Offices often choose it for tasks needing reliability.
Wireless connections offer more freedom and ease. A wireless printer connection gets rid of cable mess and lets you place devices anywhere in your Wi-Fi range. Modern wireless tech is fast and reliable for homes and small offices.
Wired networks are stable, while wireless is mobile. Your choice depends on whether you need reliability or flexibility.
Essential Components for Network Printing
Network printing needs specific hardware and software. Knowing these helps fix problems and ensures everything works together before you start.
Printer Requirements
Your printer must have network capabilities, either through an Ethernet port or Wi-Fi. Most printers have both, but older ones might need adapters. They should support TCP/IP for communication.
Network printers often have control panels for setting up connections. Some find networks automatically, while others need manual setup through their interface or software.
Computer and Network Prerequisites
Your computer needs the right drivers for your printer. While OS drivers work, manufacturer software often adds more features. Make sure your system meets the driver requirements.
Your network must have stable internet from a well-set router. For wireless, your Wi-Fi should have a strong signal in the printing area. Wired setups need Ethernet ports on your router or switch.
Knowing these network printing requirements gets you ready for the connection process. With this knowledge, you can confidently set up your devices for network use.
Preparing Your Computer and Printer
Before you try to connect your computer to a network printer, make sure you’re ready. This preparation helps avoid common problems and makes setup easier. It saves you time and stress later on.
Ensuring Network Connectivity
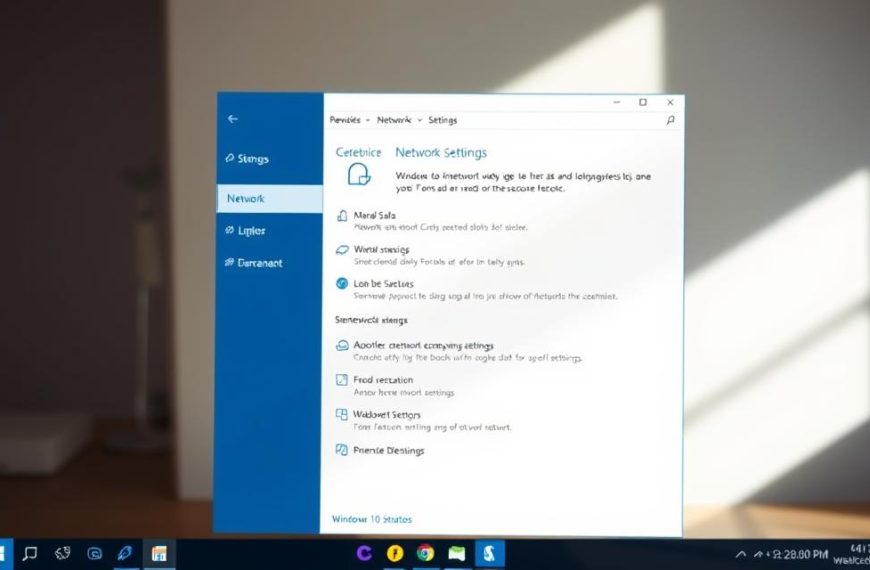
Your computer and printer need to be on the same network to talk to each other. Check your computer’s network settings or preferences. For wireless, make sure you’re connected to the right Wi-Fi with a strong signal.
Look at your printer’s display or print a network page to see if it’s connected. Most printers show their network status in their menus. This first check network connectivity step is key for everything else.
Locating Your Printer’s IP Address
Your printer’s IP address is its network ID, needed for manual setup. You can find it on the printer’s control panel or LCD screen. Go to the network or settings menu to find the TCP/IP or network status section.

You can also print a network page from your printer’s menu. This page has all the network details, including the IP address. Knowing how to find printer IP address helps with troubleshooting and advanced setup.
If your printer is connected via USB, you might need to connect it to a computer first. Then, use printer utility software to access network settings.
Installing Necessary Drivers on Your Computer
Printer drivers let your computer talk to your printer. While some operating systems have basic drivers, the manufacturer’s drivers offer full functionality. They also let you use all your printer’s features.
Go to your printer’s official website to download the latest drivers for your operating system. Most websites have tools that find your printer model and suggest the right software. To install printer drivers, just run the executable file and follow the instructions.
Keep your drivers up to date to stay compatible with system updates and new features. Regular updates can also fix performance issues and improve printing quality.
How to Add Computer to Printer Network via Windows
Windows makes it easy to connect your computer to network printers. The steps are similar for Windows 10, Windows 11, and earlier versions. This guide will show you how to do it automatically or manually.
Accessing Devices and Printers in Control Panel
To start, open your printer settings. For Windows 10 and 11, go to Settings > Devices > Printers & scanners. Or, search for “Control Panel” in the Start menu and choose “Devices and Printers”.
Both ways take you to your printer settings. The Settings app is simpler, while Control Panel has more options.
Adding a Network Printer Using the IP Address
If auto-detect doesn’t work, use the IP address method. Click “Add a printer” and then “The printer that I want isn’t listed”. Choose “Add a printer using a TCP/IP address or hostname”.
Put in your printer’s IP address. Windows will try to find the model for you. This method works well on Windows 8, 10, and 11.
Installing the Correct Printer Driver Manually
If Windows can’t find your printer model, you’ll need to install drivers yourself. Click “Install a driver” or “Have Disk” to find downloaded drivers.
Get drivers from the manufacturer’s website for the best results. Update your drivers regularly for smooth printing and full printer functionality.
Setting the New Printer as Your Default
After installing, right-click your new printer and choose “Set as default printer”. This makes it the default printer for all print jobs.
Check if it’s set as default by looking for a green checkmark on the printer icon. You can change it later if needed.
| Windows Version | Settings Path | Manual Method | Driver Installation |
|---|---|---|---|
| Windows 11 | Settings > Bluetooth & devices | TCP/IP address option | Automatic or manual |
| Windows 10 | Settings > Devices | TCP/IP address option | Automatic or manual |
| Windows 8 | Control Panel > Devices | TCP/IP address option | Manual preferred |
After setting up, print a test page to check everything works. This helps find any problems right away.
How to Add Computer to Printer Network on macOS
Apple’s macOS makes it easy to connect your computer to shared printers. It has built-in tools for adding network printers, over Ethernet or wireless.

First, make sure your Mac and printer are on the same network. This is key for all connection types and ensures they talk to each other right.
Using System Preferences to Add a Printer
Go to the Apple menu and pick System Preferences. Then, choose Printers & Scanners from the hardware section. This is where you manage all your printer settings.
Click the plus (+) button in the printers list. macOS will look for network printers on your local network. It usually finds Bonjour-compatible devices easily.
Pick your printer from the list. macOS will often install the drivers automatically. This is the easiest way to add printer on Mac systems.
The IP Address Method for macOS
If you can’t find your printer automatically, use the IP address method. You need your printer’s network address for this.
In Printers & Scanners, click the plus button then choose IP printer tab. Pick your protocol and enter your printer’s IP address.
This method connects directly to your printer. It’s great for work settings with static IP addresses. Setting up an IP printer Mac connection means you always have access to shared printers.
Selecting the Appropriate Printer Software
macOS has generic drivers for many printers. It suggests the right software during setup. For most, this works perfectly.
If your printer isn’t found, choose Select Software. Look through options or install drivers from the manufacturer. Always use the latest drivers for best performance.
After setting up, print a test page. This checks if everything is working right. Your Mac should now see the network printer for all printing tasks.
The macOS System Preferences method makes managing printers easy. Whether you use automatic discovery or manual IP setup, it’s simple for everyone.
Connecting to a Wireless Printer Network
Wireless printing makes life easier by getting rid of cables. It keeps your prints looking professional. Modern printers connect in many ways, making setup easy for everyone.
Joining the Same Wi-Fi Network
For wireless printing, you need to be on the same Wi-Fi network. Your computer and printer must share this network. It’s like a digital path for sending print jobs.
To check if you’re connected, look at your computer’s Wi-Fi settings. Compare them with your printer’s network status. Most printers show their network connection on their control panel or web interface. This step is key for wireless printing to work.
Using WPS for Simplified Connection
Wi-Fi Protected Setup (WPS) makes connecting to Wi-Fi printers easy. It sets up your network automatically, without needing to type in passwords.
To use WPS, press a WPS button on your router and printer at the same time. They then set up a secure connection. This is great for those who don’t like dealing with tech during setup.
WPS has many benefits:
- No need to type in passwords
- Security is set up automatically
- Setup is faster than manual methods
- Connections are reliable and consistent
Adding a Bonjour or AirPrint Printer
Apple’s Bonjour and AirPrint change wireless printing for Mac and iOS users. Bonjour finds printers automatically, so you don’t need to set anything up. This makes connecting easy.
AirPrint printer lets you print without any extra software. If your printer supports AirPrint, you can print directly from your Apple device. This is the easiest wireless printing.
To find out if you can use these features:
- Look at your printer’s specs for Bonjour or AirPrint
- Make sure all devices are on the same network
- Check if multicast DNS is on your router
- Restart devices if you can’t find the printer
These technologies show how modern printing focuses on making things easy for users. They keep your prints safe and reliable.
Troubleshooting Common Connection Issues
Even with careful setup, printer network connections can sometimes encounter problems. This section addresses the most frequent issues users face and provides systematic solutions to get your printing back on track.

Resolving ‘Printer Not Found’ Errors
When your computer cannot locate your network printer, start with basic checks. Make sure both devices are on the same network and that the printer is online.
Check the printer’s IP address through its control panel or configuration page. Sometimes, just restarting both your computer and printer can fix communication problems.
If the issue continues, try removing and re-adding the printer to your system. This often solves recognition problems.
Fixing Driver Compatibility Problems
Outdated or incorrect drivers can cause printing issues. Always download the latest drivers from the manufacturer’s website, not generic ones.
Ensure your operating system version matches the driver requirements. Some older printers need compatibility mode to work with newer systems.
For ongoing printer driver compatibility issues, try these steps:
- Uninstall current drivers completely before reinstalling
- Use the manufacturer’s driver removal tool if available
- Check for Windows or macOS updates that might include newer drivers
- Try different driver versions if the latest causes problems
Checking Firewall and Network Permissions
Security software might block communication between your computer and printer. Check your firewall settings for printer access to ensure printing applications have proper permissions.
Network sharing settings must allow printer discovery and communication. Make sure network discovery is enabled on your computer for device recognition.
In business environments, consult your network administrator about any group policies that might restrict printer access or require specific configurations.
| Issue Type | Common Symptoms | Recommended Solution | Prevention Tips |
|---|---|---|---|
| Printer Not Found | Device offline status, missing from list | Verify network connectivity, check IP address | Maintain stable network connection |
| Driver Problems | Print errors, missing features | Update manufacturer drivers, check compatibility | Regular driver updates |
| Firewall Blocking | Connection timeouts, access denied | Adjust firewall exceptions, review permissions | Configure printer-friendly security settings |
| Network Permissions | Authentication failures, access restrictions | Check sharing settings, user privileges | Proper network configuration from setup |
Most connection issues can be solved through careful troubleshooting. Start with simple solutions before tackling more complex configurations.
Keep a record of any changes you make during troubleshooting. This helps identify what fixed the issue and serves as a reference for future problems.
Advanced Network Printer Management
Managing network printers goes beyond just connecting them. It’s about setting up for many users. This ensures everyone can print safely and efficiently. We’ll look at how to make your shared printing better.

Setting Up a Printer for Multiple Users
Setting up a printer for many users needs careful planning. First, make sure the printer’s host computer is always on and connected. Then, give users the right access based on their department.
Windows uses the Print Management console for control. macOS uses Sharing Preferences in System Settings. Both let admins limit colour printing or set print limits for cost control.
Configuring Printer Sharing Settings
How printers share on your network is key. Turn on sharing through your system’s settings, but keep it secure. Always ask for login details to stop unwanted access.
Change sharing settings as needed. You might limit access by time or department. Check these settings often to keep your network safe.
Managing Printer Queue and Preferences
Good printer queue management means all jobs get done smoothly. You can put urgent jobs first or stop jobs that aren’t working. Most systems let you watch what’s printing live.
Change printer settings for different users or types of documents. Set defaults for paper size, orientation, and quality. This saves paper and makes printing better.
| Queue Management Action | Windows Procedure | macOS Procedure | Common Use Cases |
|---|---|---|---|
| Pause Printing | Right-click printer → Pause Printing | Open Queue → Click Pause | Toner replacement, paper jam |
| Cancel Documents | Double-click printer → Cancel All Documents | Select jobs → Delete | Wrong print job, confidential material |
| Set Priority Printing | Printer Properties → Advanced tab | CUPS web interface → Modify | Urgent documents, executive printing |
| View Job History | Print Management → Filters | System Report → Printing | Usage tracking, cost allocation |
Keep printer queues running smoothly to avoid delays. Have clear rules for printing during busy times. Keep records of any changes for future help.
Conclusion
You’ve finished the key steps to connect your computer with a printer network. This journey, from learning network basics to applying OS-specific steps, makes sure your printing works well.
This guide has shown you how to set up a printer network easily. You’ve learned how to do it for Windows, macOS, or wirelessly. Each step helps you print without any trouble.
If you face any problems, check the help from your printer’s maker, like HP or Canon. They offer specific help. Being able to handle and fix issues shows you’re getting good at network printing.

 By
By